Connected Hubs
Overview
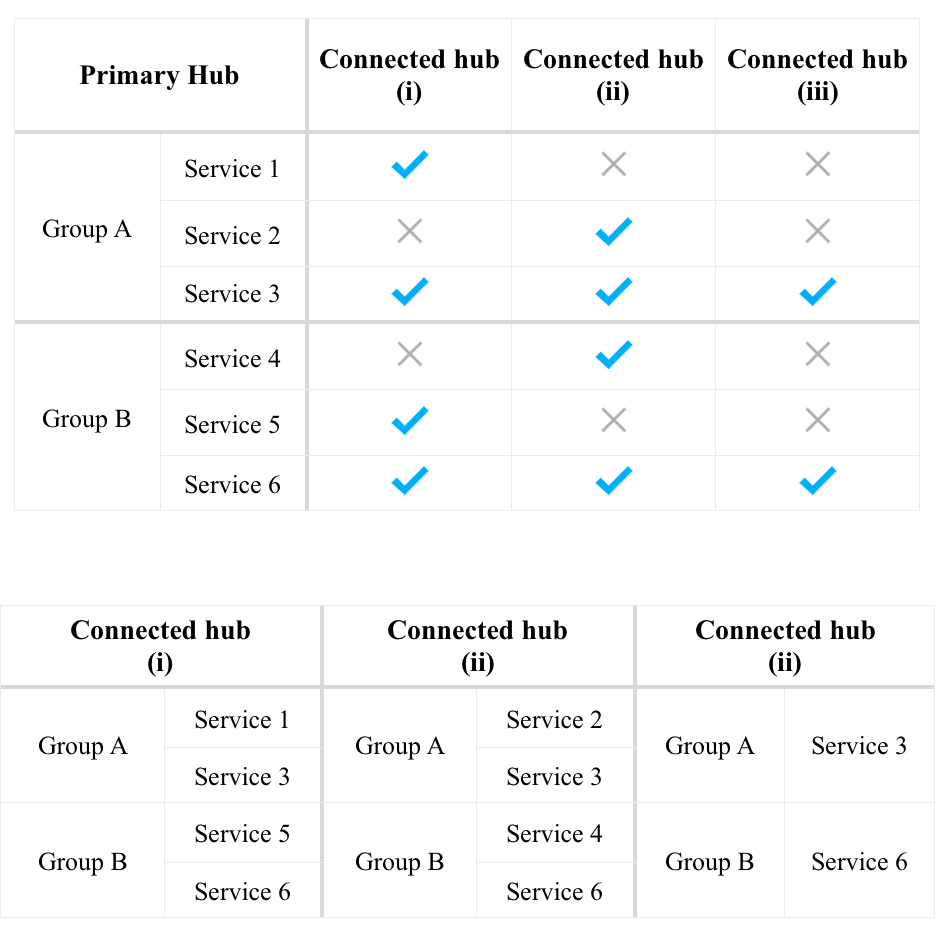
This is the overview of how multiple hubs can be configured in a primary and connected hubs configuration. In the example below, Service 3 is shared in each connected hub while service 1 & 2 are only displayed in two connected hubs.
How to create a connected hub
Click on 'Connected Hubs' under Hub Config.

To add a new hub, click on the “New Connected Hub” button located in the top right corner of the tab. Choose a new subdomain and name and click “Add” to save.

⋮ Click on the vertical ellipsis icon to View your added connected hub.

Note: Connected hubs are also visible under the Select Hub button and displayed under a primary hub when clicked on the arrow symbol.

When configuring a connected hub, instead of the option for “Services and Integrations,” there is “Groups and Services.” In this section, you are able to select services from the primary hub which you want to display in the connected hub.
In the "Groups and Services" section, click on a group and choose the services you want to display on the connected hub, and press “Save.”


After saving your changes, you will be able to see only selected services and groups on the status page that belongs to the connected hub. To go to that page, click on the blue button with the arrow 'View Status Page.'

Below there is an example of a status page of the connected hub. As you can see, the API service that exists in the Primary Hub is not visible in connected Hub A.

Variations of disruptions in configuration "Client - Pod - Data Centre"
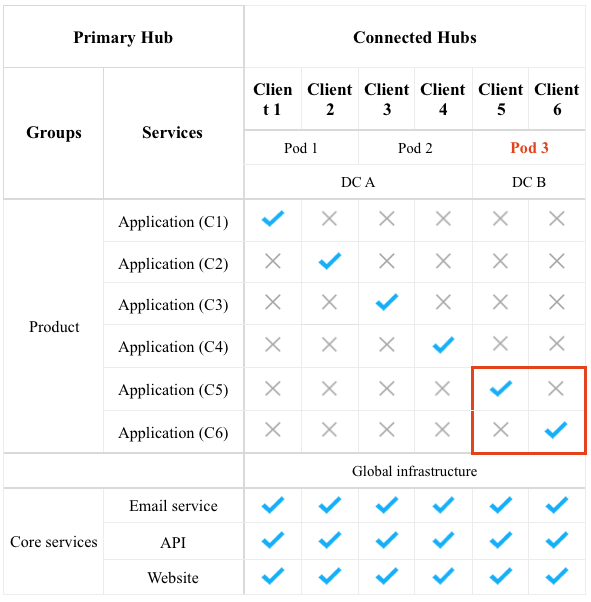
- There is an issue in Pod 3:
- Application for clients 5 and 6 is affected.
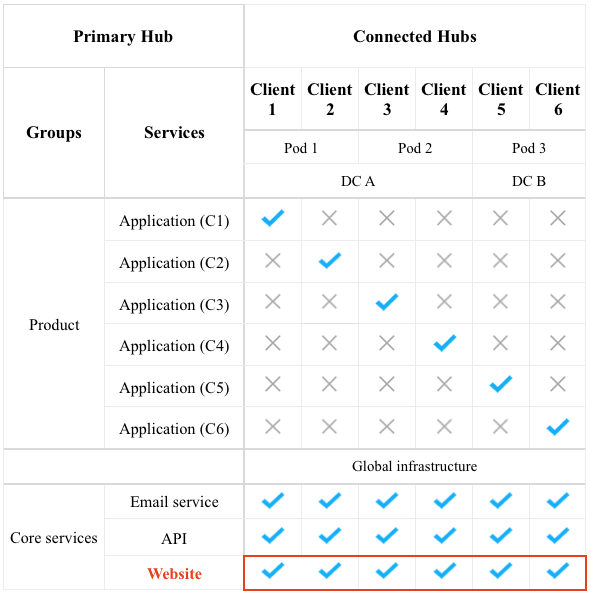
2. There is an incident and the website is down:
- as it is a shared service it is down for every client.
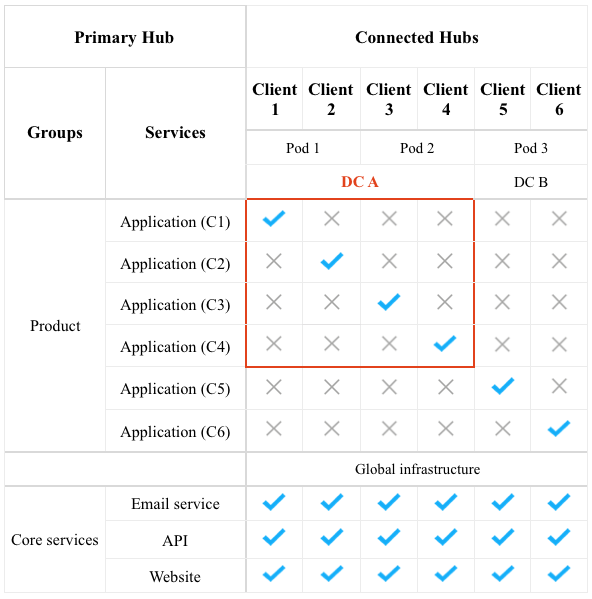
3. There is an issue in DC A:
- Application for clients from 1 to 4 is affected.
As always, please feel free to contact us with any further questions regarding using the control panel within StatusHub.